
I love music and am almost always listening to music if I have the choice. I also usually listen to headphones while working (depending on the job). I always just used whatever crappy earbuds came with my current phone and they, for the most part, got the job done. However, recently I had the (very delayed) realization that as a music lover, audiophile, and someone that is the developer of an android and kindle app that depends on extremely high audio quality I should probably have some nice headphones.
I searched through all of the consumer reviews and the only thing I learned is that I DON’T want to get a pair of “Beats by Dre” regardless of how trendy they are they are certainly not the highest quality headphones and I just want them to sound great the rest is extra. So I contacted my audio engineer friend and asked him what I should get and his response to my half page wall of text was very simple: “Sony MDR-7506.”
This isn’t meant to be a product review, but I will say that the Sony MDR-7506 headphones are AWESOME and for under $100 I don’t think you can beat them. They are insanely comfortable, light-weight, very adjustable, durable, and they fold up nicely for transport. The audio quality is amazing and after a little research I realized they are pretty much used in every studio ever so there is a good chance that the song you’re listening to was, at least in part, mixed using them.
Now on to the bad news……
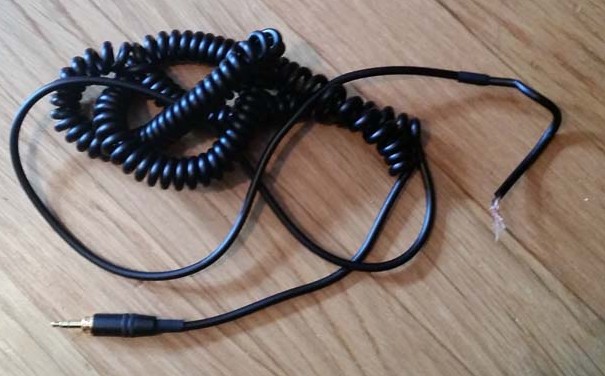
horrid curly Sony MDR-7506 coord replace it
The Sony MDR-7506 is only available with the phone-cord-style coiled cable. Truthfully it makes sense, they are meant for use in a studio and the average consumer was not considered. However, I want to throw these in my backpack daily and detangling the headphone cable everyday would almost certainly be the bane of my existence. Luckily, the headphones are extremely well documented and replacing the cable with a straight cable or an 1/8” jack was incredibly simple.
What you’ll need
- Sony MDR-7506 headphones (amazon link)
- Rosin Core Solder
- 1/8” headphone jack (optional) (amazon link)
- 1/8” headphone cable (amazon link)
- Some thin gauge wire
- Soldering Iron (someone get me this for my birthday)
- Phillips Screwdriver
- Utility knife or razor blade
- Dremel (optional)
Process
Disassembly
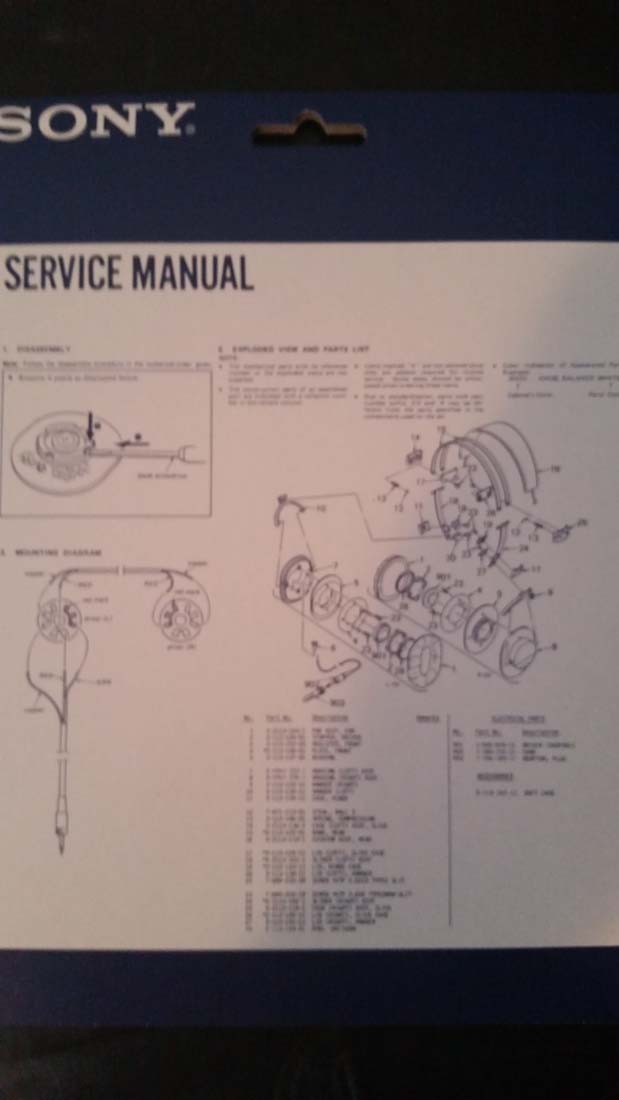
Since the Sony MDR-7506 headphones are meant for professionals they are designed to be serviceable and include full schematics for disassembly and wiring. I’ve included both at the end of this post incase someone is doing this on used headphones that didn’t include the documentation.
1.) Remove the left ear pad. This is very easy and is done by simply pulling slowly outward until the ear pad comes off. It is just held on with some sort of elastic.
2.) Remove the 4 phillips screws that are revealed once the ear pad is removed
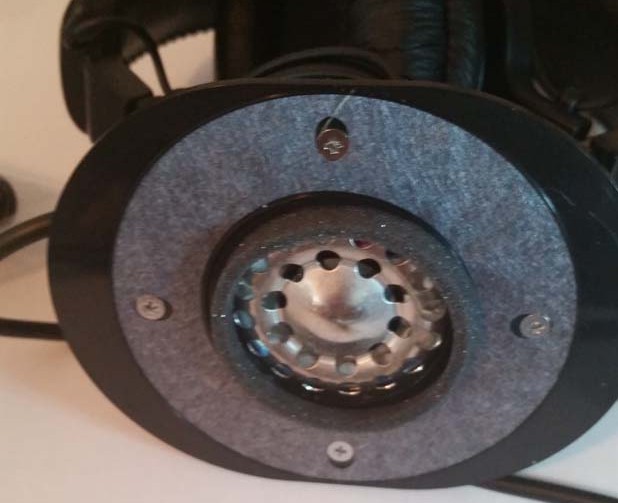
3.) Cut the wires connecting the old cable to the driver. Then remove the cable from the hook inside of the headphone and there is also a tiny clip that holds the cable in place. Once that is removed you should be able to pull it free leaving a hole that we’ll use for our new cable or headphone jack.
![]()
Install the headphone jack
From here you have two choices. If you want a detachable cable you’ll need to install an 1/8” headphone jack which requires some drilling and modification to enclosure. If you do not want to do the more advanced modifications (which could damage the headphones physically) you can just attach a straight cable permanently which will allow you to completely skip this part.
1.) Take a power drill and bore out the hole that the coiled cable was passed through until it is just large enough for the new headphone jack to fit snuggly.
2.) Take a razor blade and remove the plastic nub on the outside of the headphones. Without doing this the hole is too deep to get the nut on the outside of the headphone jack. I was able to easily cut this flush which makes it fit perfectly. If you’re using a different headphone jack your results may vary.
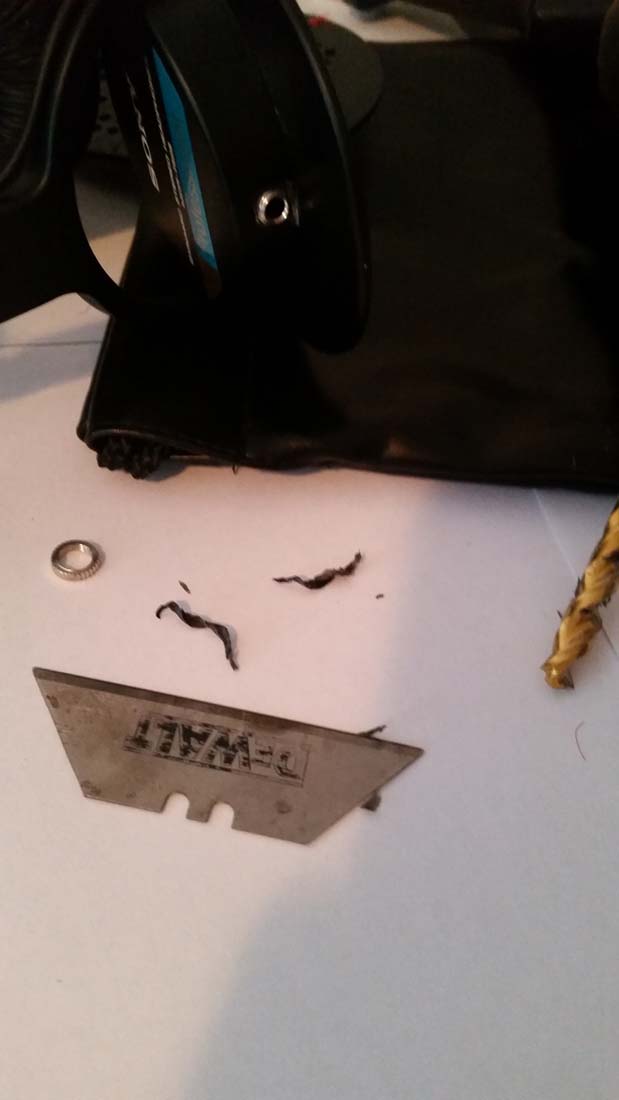
add headphone jack to sony mdr-7506
3.) Screw in the headphone jack and re-assemble the headphones to test that it fits. Make sure that the headphones fit back together snuggly and that you can tighten the nut on the outside of the new headphone jack. If not scrape away some of the plastic with the razor blade until it fits.
Wire it up
Detachable cable
If you decided to modify the enclosure and make the cable detachable follow these steps for wiring. If not see the next section.
1.) Cut 3 lengths of wire they should be long enough to comfortably work with, but short enough to fit in the enclosure when re-assembled (about 4 inches long). I chose to match the colors to the original wires. I advise you do the same if you can.
2.) Using the soldering iron heat up the 3 solder points one at a time. Once the solder is soft, pull the old wire out and insert the end of the new wire. Add a little bit of solder on top to ensure the wires stay put. Repeat for each wire.
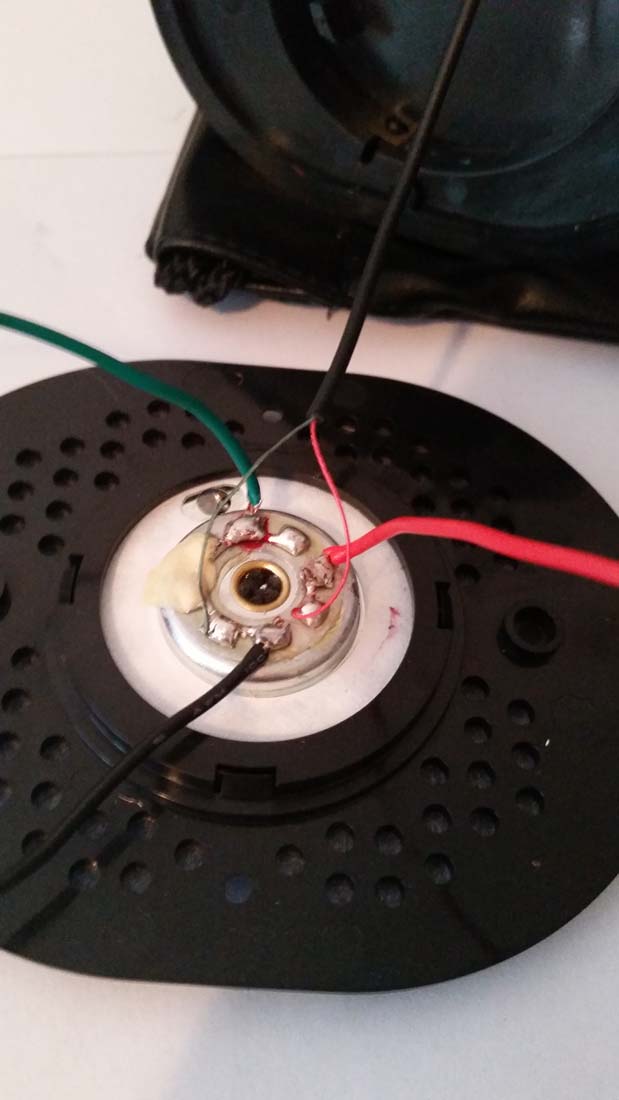
Solder cables to the back of the driver
3.) Attach the three wires to the appropriate pins on the headphone jack. On mine left (Green wire) was labeled as 1 and right (Red wire) was labeled as 2. Do not solder the wires yet just feed them through and twist them so they stay.

4.) Test the headphones. Using an 1/8” headphone cable connect the (disassembled) headphones to an audio source that allows you to control balance (I just used my computer). Make sure audio is coming out of both speakers and that Left / Right balance works as expected (left is left, right is right).
5.) Once you are sure everything is working correctly solder the three wires to the headphone jack.

Non-detachable cable replacement
If you chose not to modify the enclosure and go with a permanent straight cable follow these steps. This is not the method that I did so there are no pictures, but the pictures in the section above should give you a pretty good indication of how to do this.
1.) Pass the wire through the hole where the old wire was ran.
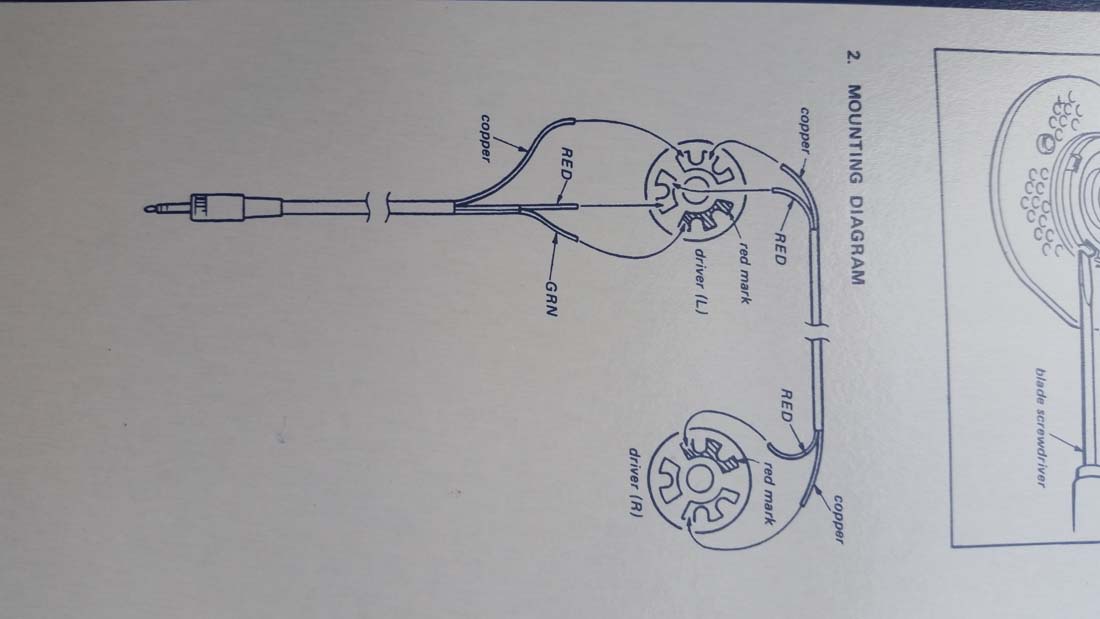
2.) Strip the new wires if they are not already stripped and twisted them with the wires you cut off earlier. Be sure to connect them correctly (see wiring diagram at the end or pictures above)
3.) Plug your new cable in to an audio device capable of controlling balance. Make sure audio is coming out of both speakers when the balance is centered and that when shifting balance between left and right that the audio is coming out of the correct side.
4.) Using a soldering iron heat up each of the three solder points individually. Pull the old wire out of the heated solder and insert the new wire. Add a little bit of solder on top if needed to ensure a secure connection. Repeat for each of the 3 wires.
Re-assemble
1.) Insert the jack through the hole you drilled earlier and tighten the nut down as much as possible.

2.) Put the front plate back on being careful to route the wires around the outside so they fit in neatly. You may also want to put a piece of electric tape over the contacts on the headphone jack to ensure it doesn’t touch the driver. I did this just to be safe (although I had plenty of clearance).
3.) Insert the 4 screws to hold the front plate in place.
4.) Put the headphone pad back on by carefully stretching it over the front plate and pushing the edge in to the groove. This is a bit tricky, but after a lot of wiggling and pulling and adjusting it goes back on just fine (they’re designed to be replaceable)
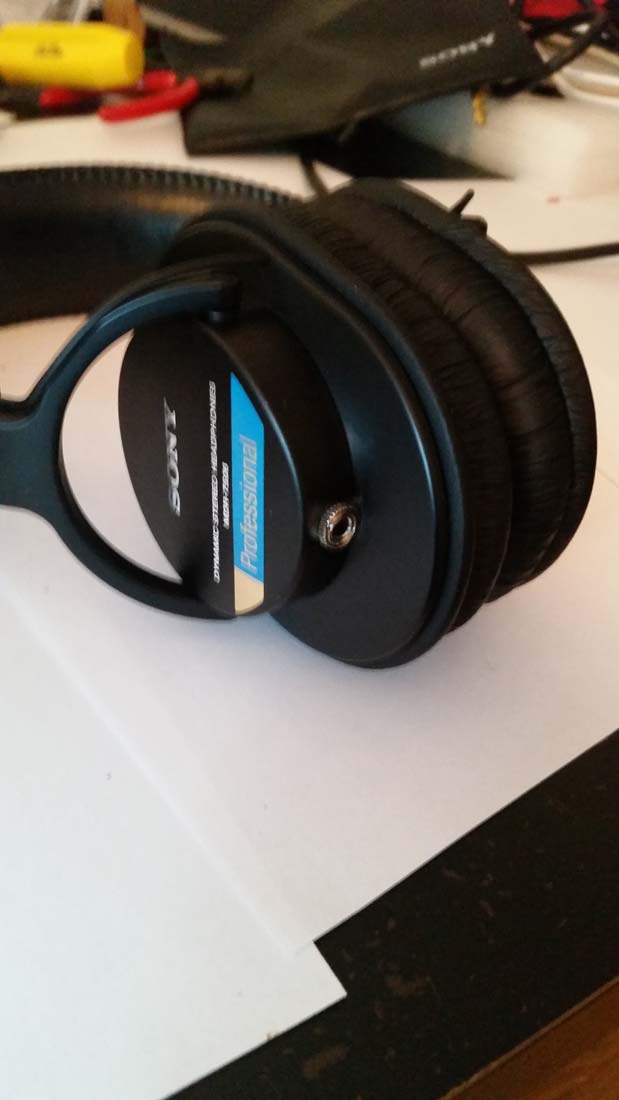
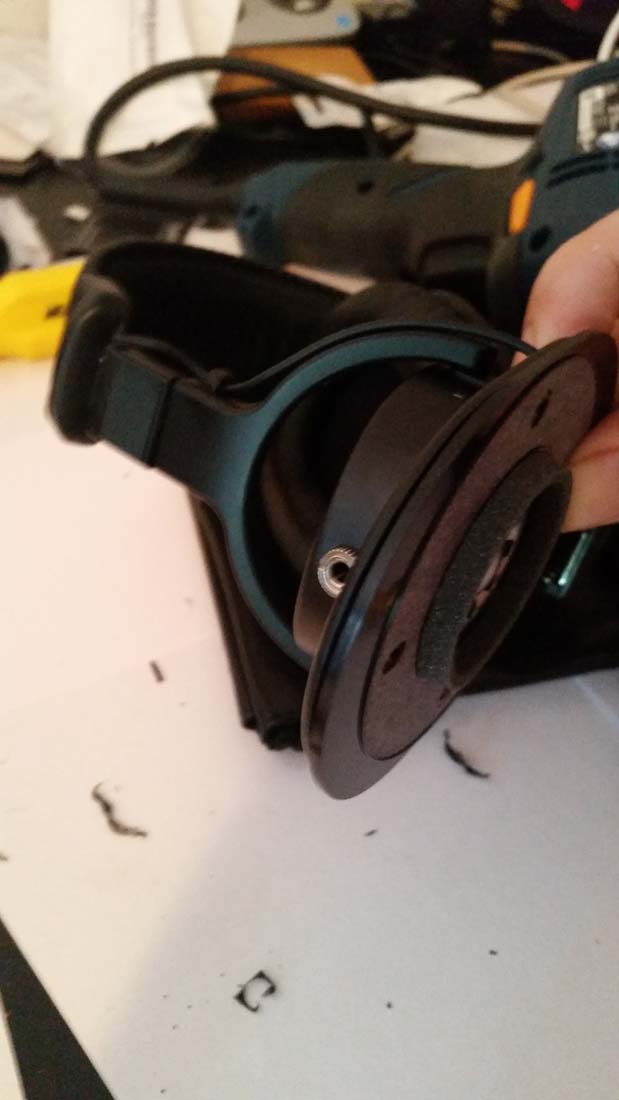
reassembled and better than ever
5.) One problem I noticed with this is the headphone jack keeps the headphones from folding completely. To fix this I just used a Dremel with a grinding stone and carved out the bracket the bracket until the headphone jack had enough room. You could probably also do this with a file if you don’t have a Dremel. Once this is done they fold up nicely.

Test them out and enjoy!!

Additional resources
Schematics

Saleh
December 16, 2015 at 12:33 pm
Thanks for this comprehensive instruction. I had these for a while but didn’t appreciate them so much. I always wanted a pair of Bose with noise cancellation.I finally bought them and returned them the next day. The sound quality on Sony is great (now I appreciate them!). the only problem I have is the cord which I hope I can fix it with this instruction.
Mei
January 12, 2017 at 9:32 am
Thanks for putting this online. I have those headphones and just ordered the bits to convert them to a detachabale cable.
Thanks!
Brian Whitecotton
June 11, 2017 at 7:06 pm
Excellent write up. About to make this mod to my daughter’s 7506. She uses them for music recording and found the coil to pull too much on the one side. Too bad Sony won’t offer a version with this option. Anyway, thank YOU!
Soleil Golden
July 17, 2017 at 12:56 pm
Lovely guide, well illustrated for a straightforward and crucial mod. Thank you for posting this!
This feature is literally the only thing that has made me consider headphones at twice the price. I’ll definitely be making this mod on mine. ♥️